Integrate Stripe Payment Gateway Using PHP and JavaScript
Stripe Payment GateWay is payment suite provided by stripe. An Irish company founded by John and Patrick Collison in 2010. It provides businesse to accept electronic payments. Integration process in Checkout method is quite easy and secure.
In Checkout method, sensitive credit card information does not sent to stripe via your server. So, You do not need to take care about PCI compliance.

Stripe payment gateway offers 2 methods of integration in PHP:
1) Stripe checkout integration
2) Stripe custom integration (Stripe.js)
Stripe Checkout Integration Using PHP and JavaScript
Stripe checkout supports modern browser including Google Chrome, Firefox, Safari, Internet Explorer 9 and above versions. It also increase your server’s security by sending credit card data directly to stripe server.
In this tutorial we will learn to integrate the custom stripe integration with stripe.js. Below code example demonstrate the stripe integration with stripe.js
|
1
2
3
4
|
index.php
payment.php
/js
--stripe.js
|
The first step is to build a HTML form for your product and embed stripe script using JavaScript <script> tag.
|
1
2
3
4
5
6
7
8
9
10
11
12
13
14
15
16
17
18
19
20
21
22
23
24
25
26
27
28
29
|
<?php
/*
* @author Gopal Joshi
*/
?>
<html>
<head>
<title>Stripe Demo - Sgeek</title>
</head>
<body>
<div>
<p>SSL Certificate ($50)</p>
<div>
<form action="return.php" method="POST">
<script
src="https://checkout.stripe.com/checkout.js" class="stripe-button"
data-key="pk_test_ZAvblirrUl7Vvvbi1F6GJiy3"
data-amount="5000"
data-locale="us-en"
data-name="SSL Certificate (Demo Product)"
data-description="SSL Certificate description ($50)"
data-image="https://stripe.com/img/documentation/checkout/marketplace.png"
data-locale="auto">
</script>
</form>
</div>
</div>
</body>
</html>
|
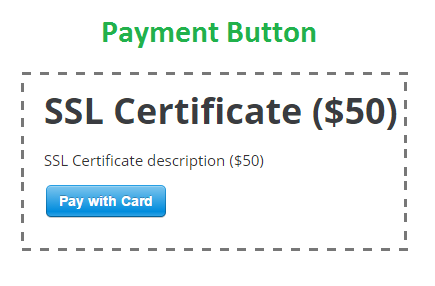
Insert above code where you want to add Payment Button in the web page. Now, Open page in browser you will see Payment button where you embedded the stripe script. The stripe checkout script will automatically creates the HTML form for the payment. It also validates the user input and generates unique token for the payment.

Configuration Options
| Parameter | Description |
|---|---|
| data-description: | It holds the description of product |
| data-name: | Holds product name |
| data-key: | The key provided by stripe for transaction |
| data-amount: | Amount of payment. By Default The amount will be in cents. |
| data-locale: | Holds Language code in which checkout will display. Set auto to show in the user’s preffered language. English will be used by default. |
| data-zip-code (true or false): | Specify whether payment should validate the billing ZIP code. |
| data-billing-address (true or false): | Set true to collect user’s billing address. |
| data-image: | Image or Logo show in payment popup. It supports gif, jpeg and png files only. |
| Set a URL in form’s action, where you want to redirect the page having transaction details once transaction completes. | |
Optional Config
| Parameter | Description |
|---|---|
| data-currency: | The currency of the amount. Three digit currency ISP code, Eg USD. See List of currencies which stripe supports |
| data-panel-label: | Label of payment button in Checkout Form. |
| data-shipping-address(true or false): | Set true to collect user’s shipping address. |
| data-email: | You can prefill email of user if you have already user’s email address. |
| data-label: | Label of payment button. |
| data-allow-remember-me(true or false): | Specify whether to include the option to “Remember Me” or not. The default is true. |

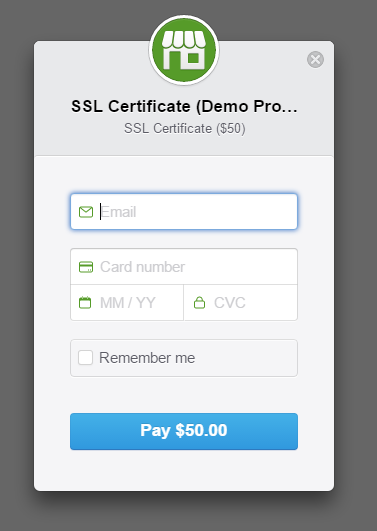
In By clicking on the button, Payment Popup will show having Payment inputs such as Email Address, Card Number, Expiry Date, CVV and Remember me option. By clicking on Payment button Checkout sends all details to stripe server directly. After validating checkout details stripe submits form and returns token or error message if the checkout fails to the URL you have mentioned in form action.
Success Response
|
1
2
3
4
5
6
|
Array
(
[stripeToken] => tok_15r56usdmwkLqZfF74RZ7brv
[stripeTokenType] => card
[stripeEmail] => gopal@sgeek.org
)
|
stripeToken will be used to charge the card in later part.
Response Parameters
| Parameter | Description |
|---|---|
| stripeToken: | Token Id of the payment details |
| stripeEmail: | Email Address Of user entered during checkout |
| stripeBillingName: | Billing address details if enabled |
| stripeShippingName: | Shipping address details if enabled |
Once Checkout process completes and collects checkout details, Last step is to charge the card. It will use Stripe Library to charge user’s card.
First of All, install Stripe Library if you have not installed yet. To install library, Add stripe/stripe-php in composer.json and update the composer by running composer update command. Read more about Composer
|
1
2
3
4
5
6
|
// composer.json
{
"require": {
"stripe/stripe-php": "4.*" // Version
}
}
|
Now add create stripe object and charge user’s card by using Create method.
|
1
2
3
4
5
6
7
8
9
10
11
12
13
14
15
16
17
18
19
20
21
22
23
24
25
26
27
28
29
30
31
|
<?php
/*
* @author Gopal Joshi
*/
if(!empty($_POST['stripeToken'])){
\Stripe\Stripe::setApiKey("sk_test_AKasas32OvBiI2HlWgH4olfQ2");
// Token submitted by the form:
$token = $_POST['stripeToken'];
// Charge the user's card:
$charge = \Stripe\Charge::create(array(
"amount" => 5000,
"currency" => "usd",
"description" => "SSL Certificate (Demo Product)",
"source" => $token,
"metadata" => array("purchase_order_id" => "SKA92712382139") // Custom parameter
));
$chargeJson = json_decode($charge);
if($chargeJson['amount_refunded'] == 0 && $chargeJson['failure_code'] == null && $chargeJson['captured'] == true){
echo "Transaction completed successfully";
}else{
echo "Transaction has been failed";
}
}else{
echo "Transaction has been failed";
}
?>
|
The $charge immediately receive the response of the request in JSON format. If the charge attempt succeed, The card have been charged successfully and amount will be sent as per stripe’s policy. In case of error, stripe returns specific error code with error message. Here is list of error codes along with error message.
That’s it. Stripe Payments has been integrated into a web page.
We will discuss how to Save credit card details for later in next Tutorial. Comment or Tweet if you have any queries related to stripe integration.
Read More:
Payumoney Payment Gateway Integration In PHP
How To Setup PayPal Account
Introduction To PayPal Adaptive Payments
Introduction To Adyen Payment Platform
sfiletypechecker-JQuery Plugin Validate Input File

